BLOG

Blog
Home> Blog

Overlock and Edge Binding

Aug 24, 2025
What is Overlock and Edge Binding
Overlocking is the process of sewing a fabric edge with three or four threads using an overlock sewing machine. This creates a neat finish, prevents fraying, and reduces bulk. Overlocking is the process of sewing a separate strip of fabric along the raw edge of the fabric. This strip covers the raw edge, preventing fraying and adding strength. It also provides a decorative detail. It is usually applied by hand to add thickness to the edge. Banding is the process of covering the raw edge of the lining with a thin strip of fabric during sewing. Covering the exposed edge of the lining provides durability and aesthetics.
lilinrui_89219_close_up_fabric_edge_binding_with_overlocker_mac_3dd1d148-da10-4e4c-9ddd-769ea707a6c5.webp
Steps for Binding with an Overlocker
Prepare the fabric, binding, and project edges: Trim the edges of the project squarely. Trim the hemming strip to 2.5 inches wide, hem it if necessary, and fold it in half lengthwise. Set up your overlock machine: Use only your left needle to sew a firm, slightly thick stitch. To properly align the hemming edge, adjust the overlock machine's cutting width to 6 mm (1/4 inch). Begin sewing: Sew the hemming strip over the raw edge of the work, aligning the raw edges. Begin sewing in a straight line, not at the corners. Sewing Guide: Continue sewing the hemming along the edge. The overlock machine's blade trims any excess fabric near the edge. The machine feeds the fabric evenly, so pins are unnecessary. Miter the corners. After reaching the corners, fold and miter the hemming neatly to keep the edge smooth and avoid wrinkles. Finish the hemming: After sewing the edge, fold the hemming over to the front. You can use heat-stitching thread in the lower looper to temporarily secure it. Iron the fabric. Topstitch. Use a narrow or straight zigzag stitch to sew down the folded edge.
22.jpg
Overlock Stitching vs. Edge Binding: Many Advantages in Overlock Stitching
Overlock stitching offers many advantages over edge binding for finishing fabric edges in garment construction. Overlock stitching utilizes a special machine to sew, trim and finish edges simultaneously with three or four threads simultaneously. It's fast, efficient and produces strong seams ideal for all fabrics - especially knits and stretchy materials like spandex. Furthermore, overlock finishes look clean and professional as they're easier to learn on machine while enabling high-speed production once set up. Edge binding involves hand sewing fabric tape manually around edges, adding layers and thickness. It requires binding strips, special tools and practiced skill; this method may take more time, be less material efficient, create bulkier edges than desired in certain garments and create bulkier seams overall.
11.jpg
lilinrui_89219_overlock_vs_edge_binding_stitching_close_up_fabr_2b61e331-236b-443c-8efb-7bd7396c55cb.webp
Sewing Techniques with an Overlock Machine
An overlock machine creates strong and clean seams and edges suited for knits and stretch fabrics, ideal for knitwear. It trims seam allowances as you sew, encloses raw edges to prevent fraying, and maintains seam elasticity for seamless results. Key Tips: For successful seam stitching, align fabric with seam guides and sew slowly using differential feed for knit fabrics to avoid stretching. Stitch Options: Four-thread overlock stitches secure seams and edge finishes while three-thread finishes only the edges; while rolled hem stitch types work best on lightweight fabric hems. Shoulder Stabilization: Add ribbon strips on knit shoulder seams to avoid stretching. Hemming: For stretch fabrics, use blind hem, narrow overlock, rolled hem or overlock stitch techniques for hemming. Working curves: Sew slowly, gently pushing fabric on outside curves while being extra careful around inside curves to avoid puckering. Machine Prep: Use a new needle, thread four threads carefully, adjust tension accordingly and test stitches before beginning your sewing journey. Pinning: Pinch parallel to seams or use glue basting to align layers properly and avoid blade damage, keeping layers aligned as you sew.
lilinrui_89219_close_up_hands_operating_sewing_machine_stitchin_20a49d95-2bc3-4b88-8f40-c679abac462d.webp
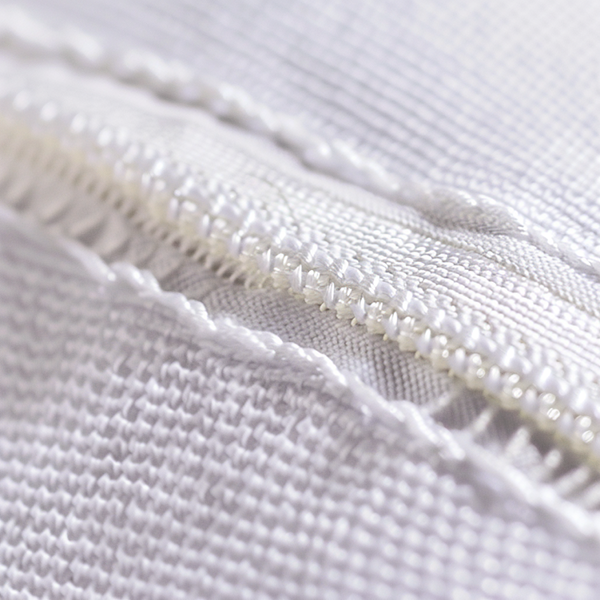
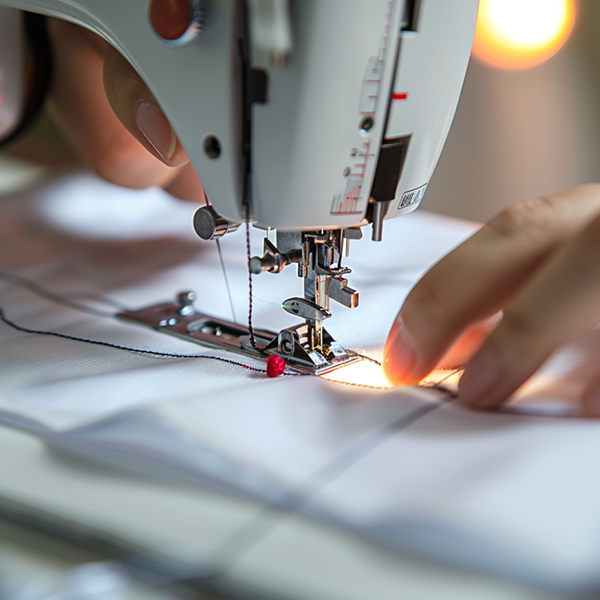
OVERLOCK STITCH | No Serger Needed
Use these sewing machine techniques to simulate an overlock stitch without using a serger and ensure edges remain fray-free: Zigzag Stitch: To achieve the optimal result for light to medium weight fabrics, sew along raw edges using a zigzag stitch width of 4-5 and length 1-2, using this stitch for raw edges with raw edges. Overlock Stitch Setting: Many machines offer an overlock stitch combining elements of both zigzag and straight stitches for strength and stretch, making this stitch particularly suitable for knit fabrics. Use an overlock presser foot for neat finishes! Zigzag Plus Straight Stitch: When sewing heavier fabrics, combine zigzag stitching with straight stitching for greater durability. Sew both techniques inside one another for extra reinforcement. Slanted Ladder Stitch: Replicating stretchable serger stitches, this stitch can be easily adjusted in width and length for optimal edge coverage. Trim Seam Allowances: In order to recreate serger edge trimming, cut seam allowances close to stitching before sewing.
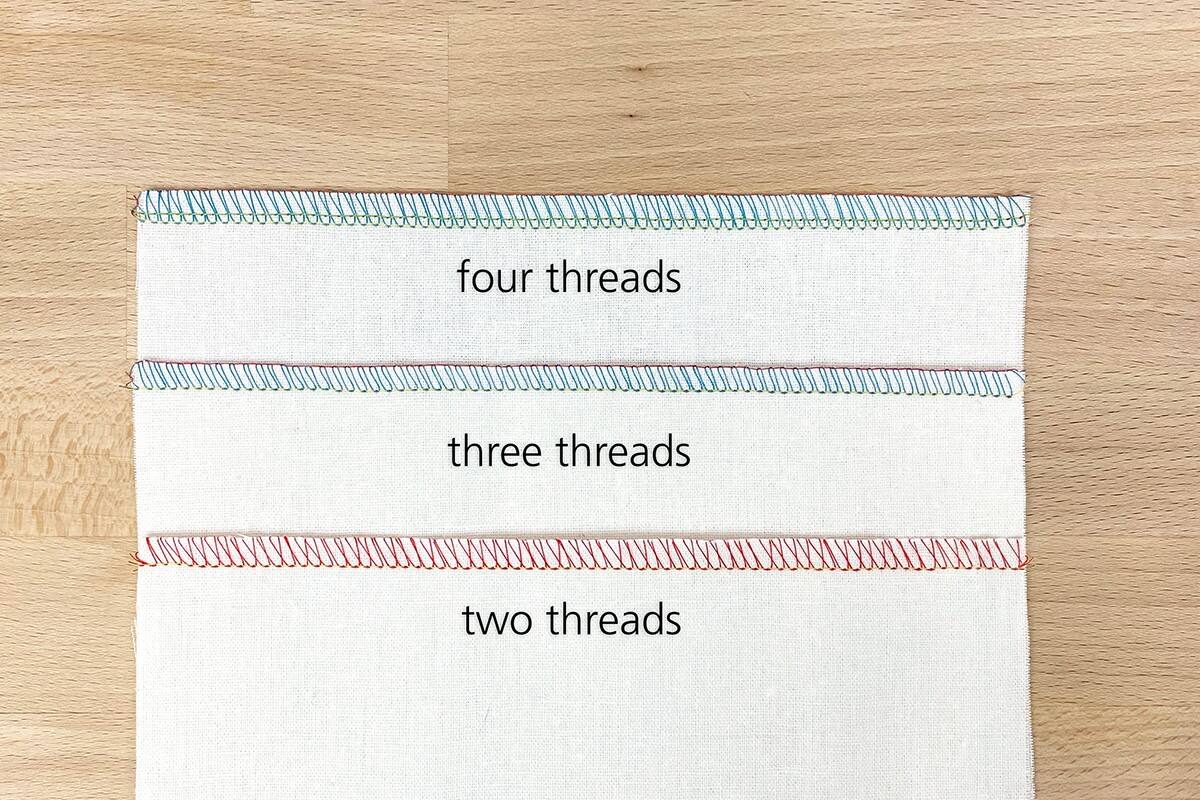
Sewing Machine Overlock Stitch Alternatives
You can also simulate an overlock stitch on a regular sewing machine to achieve a finished edge: Zigzag Stitch: When sewing along the raw edge of light to medium-weight fabrics, use a zigzag stitch with a width of 4-5 inches and a length of 1-2 inches (for light fabrics). Overlock Stitch: Combines straight and zigzag stitches for a stable, aesthetically pleasing edge. Three-Step Zigzag Stitch: This three-step zigzag stitch maintains the fabric's stretch while providing excellent elasticity and edge protection. Double Overlock Stitch: Two rows of zigzag stitches with a connecting straight stitch are suitable for heavily abraded fabrics. Trapezoid Stitch: Provides stretch and strength similar to an overlock stitch. Zigzag with Straight Stitch: For added durability, combine a zigzag stitch with a straight stitch for added internal reinforcement.
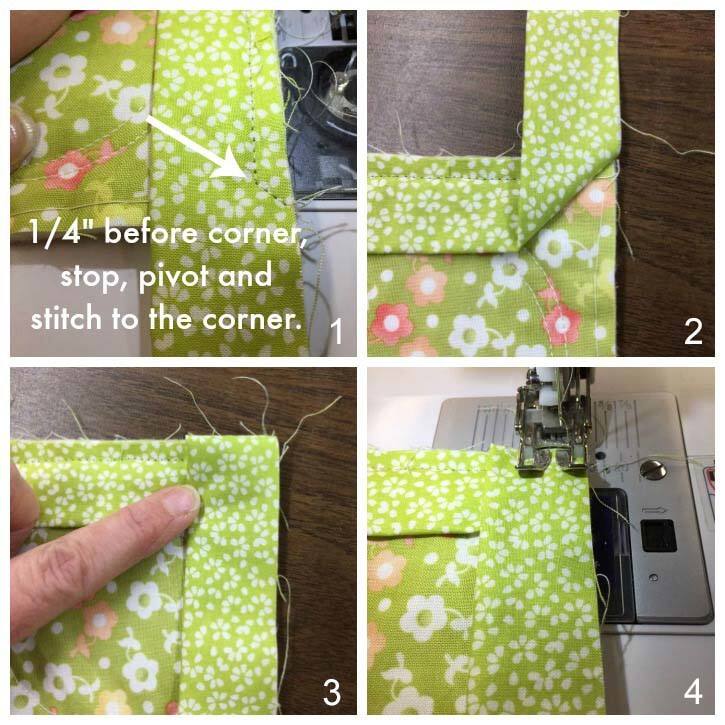
Special Tips for Overlock Sewing
Reduce Bulk at Crossed Seams: At thick intersections, make small snips in seam allowances (not through seams) on opposite sides to spread bulk outward. This will simplify machine sewing and ensure more reliable stitching results. Neckbands and Circular Seams: Cut small slits at both the start and end of circular seams to prevent fabric bunching and ensure precise alignment. Hemming Knits Without Coverstitch Machine: Fold hems twice, disengage the blade, and sew from the wrong side catching only the folded edge for a neat and stretchy finish. Adjust Differential Feed Settings: Modifying differential feed settings can help avoid stretching or puckering of knit fabrics with curves. Threading and Tension: For four-thread machines, thread each thread carefully so it matches perfectly; adjust tension accordingly to ensure consistent stitches. Test on Scrap Fabric: Always practice on scraps to fine-tune stitch length, tension, differential feed settings and blade settings. Unpick Overlock Stitches Properly: Learn techniques for safely unpicking overlock seams without risk of fabric damage.

Get a Free Quote

Our representative will contact you soon.
Email
Name
Company Name
Message
0/1000